ChatGPT ads became genuinely measurable in May 2026, when OpenAI shipped pixel-based measurement and a Conversions API alongside its self-serve Ads Manager. That changed the channel's status from "interesting experiment" to "testable line item" — but only for advertisers who instrument tracking properly before they spend.
This guide walks through how that works in Soku, end to end: installing the Soku Pixel, verifying it fires, setting up server-side conversions, and letting the AI agent run the channel. It's the second post in our ChatGPT Ads series — for the platform walkthrough see our hands-on look at the Ads Manager beta, and for the background start with the ChatGPT Ads explainer.
Why tracking comes first on this channel
On a mature platform you can get away with sloppy measurement for a while — benchmarks exist, auto-bidding compensates, and your account history fills gaps. ChatGPT ads offer none of that cushion. The channel is weeks old, reporting refreshes with a lag, and roughly 60% of attributable conversions land outside the immediate click window because conversational research cycles run long. Without first-party conversion data flowing from day one, you cannot tell whether your $3–5 CPCs are buying customers or curiosity.
During OpenAI's managed pilot, the loudest advertiser complaint was exactly this: brands paying $200,000 minimums couldn't see whether their ads worked. The measurement layer now exists. Use it from the first dollar.
What the Soku ChatGPT Ads integration gives you
In Soku, the ChatGPT Ads integration lives under the top-level Integrations entry in the sidebar, in the Bring Your Own tab alongside Meta Ads, Google Ads, and GA4:
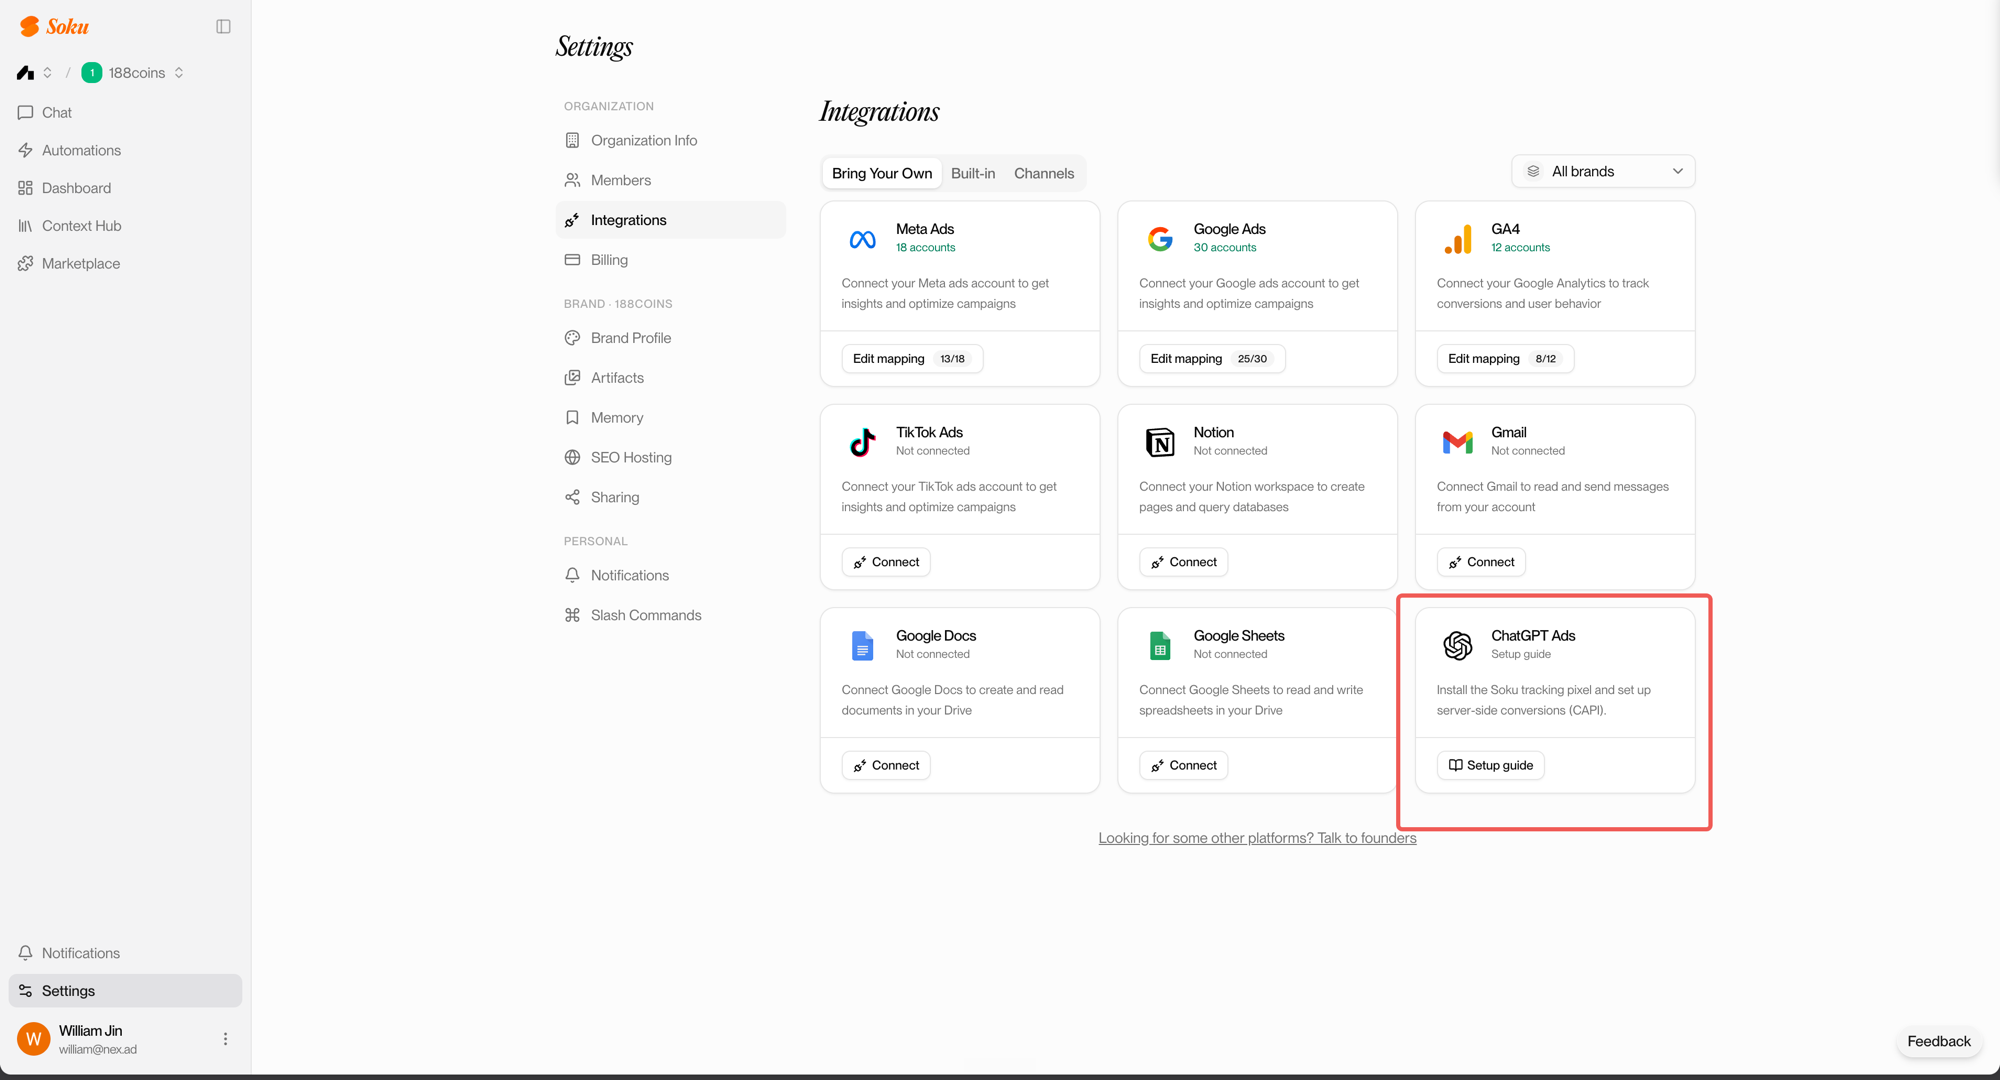
Unlike the Meta or Google cards, there's no OAuth dance here. The card opens a guided setup for the Soku Pixel — Soku's own tracking layer — and server-side conversions. Two things are worth understanding about the model:
- Pixels are provisioned for you. Your Soku admin provisions the pixel and its CAPI key for your organization; they appear in the setup dialog ready to use. You never create or configure a pixel in a third-party console.
- One tracking layer, every channel. The same pixel that attributes your ChatGPT ads traffic feeds Soku's dashboard, where ChatGPT Ads is a first-class platform next to Meta and Google — same breakdowns (campaign, country, device, landing page), same conversion definitions, no cross-dashboard reconciliation.
Clicking Setup guide opens the three-step dialog:
Step 1 — Install the pixel on your site
The dialog gives you a copy-paste snippet with per-platform instructions for HTML, Shopify, React, Next.js, WordPress, Webflow, and Framer. The core install is one script tag in your site's head, on every page:
<!-- Soku Pixel -->
<script
  src="https://pixel.soku.ai/soku-pix.js"
  data-pixel-id="YOUR_SOKU_PIXEL_ID"
  async></script>
Select your provisioned pixel in the dialog and the snippet fills in your real pixel ID. A few implementation notes that save debugging time:
- Every page, not just landing pages. Conversational journeys bounce around your site before converting; partial coverage produces partial attribution.
- Privacy defaults are conservative. The pixel hashes identity fields (email, phone) with SHA-256 before anything leaves the browser, honors Global Privacy Control signals, and supports region-based disabling for EU/EEA/UK traffic out of the box.
- The async tag doesn't block rendering — there's no performance excuse to defer the install.
Step 2 — Verify it's firing
After deploying, open your site with your browser's Network tab open. You should see requests going to your Soku pixel domain — and only there. The pixel's verification lifecycle starts as pending and flips to verified once real events arrive; your Soku admin can confirm pixel status from the admin console.
If nothing fires: check that the script tag made it into the deployed HTML (not just your local build), that an ad blocker isn't eating it in your own test browser, and that the pixel ID matches the one provisioned for your org.
Step 3 — Set up server-side conversions (CAPI)
The browser pixel captures attribution context — who arrived from where. The actual conversion event (the purchase, the signup, the qualified lead) should come from your backend, where order values and customer state actually live. That's the Conversions API:
The mechanics, as wired in the setup dialog:
- On the client, the pixel exposes the attribution context your backend needs — click ID, visitor ID, session ID — via a helper (
window.soku.getCAPIData()). Pass it to your backend with the order. - Your backend posts the conversion to the Soku CAPI endpoint, authenticated with the CAPI key shown in the dialog (revealed on demand, rotatable by your admin):
curl -X POST https://pixel.soku.ai/capi/events \
  -H "Authorization: Bearer YOUR_CAPI_KEY" \
  -H "Content-Type: application/json" \
  -d '{
    "event_name": "Purchase",
    "event_time": 1718000000,
    "event_id": "order-10042",
    "action_source": "website",
    "event_source_url": "https://yourstore.com/checkout/thanks",
    "user_data": { "em": "<sha256-hashed email>", "external_id": "cust-381" },
    "custom_data": { "value": 89.00, "currency": "USD", "order_id": "10042" }
  }'
The dialog includes ready-to-paste implementations in JavaScript, Python, Node.js, and cURL. Two details matter more than they look:
event_idis your deduplication key. If the browser and your server both report the same conversion, the event ID is what collapses them into one — send a stable, unique value per conversion (your order ID works).- Send real values. CPA math on this channel needs honest
valueandcurrencyfields, because the whole point of the test is comparing cost per dollar of revenue against your Meta and Google baselines.
Step 4 — Let the agent run the channel
With tracking live, the operational work moves into the Soku chat. The agent treats ChatGPT Ads like any other connected channel:
- Creative production at spec. ChatGPT ad cards allow 16–24 character headlines and 32–48 character descriptions — tighter than anything you run elsewhere. Ask the agent for variants in the "Brand: Benefit" format and it drafts within spec, ready for review.
- Cross-channel monitoring. The dashboard breaks performance out by platform — ChatGPT Ads sits beside Meta and Google with the same campaign, country, device, and landing-page dimensions. The agent flags when the new channel's CPA diverges from your benchmarks.
- Budget discipline. Early-channel testing fails most often from sunk-cost drift. Set your decision threshold up front (a common one: scale if blended CPA lands within 1.5× your Google Search CPA on a 28-day window) and have the agent hold you to it.
For how that 28-day window and the no-cookie attribution model actually work under the hood, see our ChatGPT ads attribution deep-dive — and for whether this channel deserves budget at all relative to the incumbents, ChatGPT Ads vs Google Ads vs Meta Ads.
FAQ
Do I need my own OpenAI Ads Manager account?
Yes — ad buying happens in OpenAI's Ads Manager (or through its partners), and account review is manual, so register early. Soku's layer handles the measurement side (pixel + CAPI) and the ongoing campaign operations.
Is the Soku Pixel specific to ChatGPT ads?
No. It's Soku's first-party tracking layer: install it once and it attributes traffic and conversions across your connected channels, with ChatGPT Ads as the newest platform it covers.
What if I don't have a backend developer for CAPI?
Start with the browser pixel alone — you'll get click and visit attribution immediately. Add CAPI when you can; server-side events are what make revenue-based CPA trustworthy, and the dialog's code samples are close to paste-ready.
How do I get a pixel provisioned?
Pixels and CAPI keys are provisioned by your Soku admin and appear in the setup dialog automatically. If the dialog shows none, contact your admin (or talk to us from the Integrations page).
Does this respect privacy regulations?
The pixel hashes identity fields by default, honors Global Privacy Control, and can be disabled by region (EU/EEA/UK presets included). Advertisers never receive ChatGPT conversation data from OpenAI — reporting is aggregated.