Conversion names are a mess across platforms. The same business goal might be tracked as Lead in one Meta campaign, CompleteRegistration in another, Submit lead form on Google Search, and Sign-up on PMax. Conversion mapping fixes that — you group all of those into the categories you actually want in your reports, so Meta and Google line up side by side.
This defines your reporting taxonomy. It is not used to evaluate lead quality.
Why it matters
The same objective, tracked four different ways, becomes one clean column:
| In ad platforms | In Soku reports |
|---|---|
Meta — Lead | Sign-up / Acquisition |
Meta — CompleteRegistration | Sign-up / Acquisition |
Google Search — Submit lead form | Sign-up / Acquisition |
Google PMax — Sign-up | Sign-up / Acquisition |
Map it once, and every report uses the same columns across platforms and campaigns.
Before you start
Have these ready:
- The categories you want in reports — e.g. Sign-up / Acquisition, Purchase / Paid, Booking / Inquiry.
- Your existing conversions on each platform — Meta events / custom conversions, and Google Ads conversion actions.
- Which category each conversion belongs to — multiple conversions can map to the same category.
Prerequisite: your ad accounts must be connected so their conversion actions flow into Soku. See Connecting accounts.
Open the conversion group editor
From the Dashboard, click Conversion Groups in the top-right toolbar. A conversion group is one reporting category plus the rules and platform conversions that feed it. Create a new group or edit an existing one to open the step-by-step editor.
The editor walks through five steps — Basics → Actions → KPI Requirements → Goals → Review — and you can jump back into any step from the Review screen.
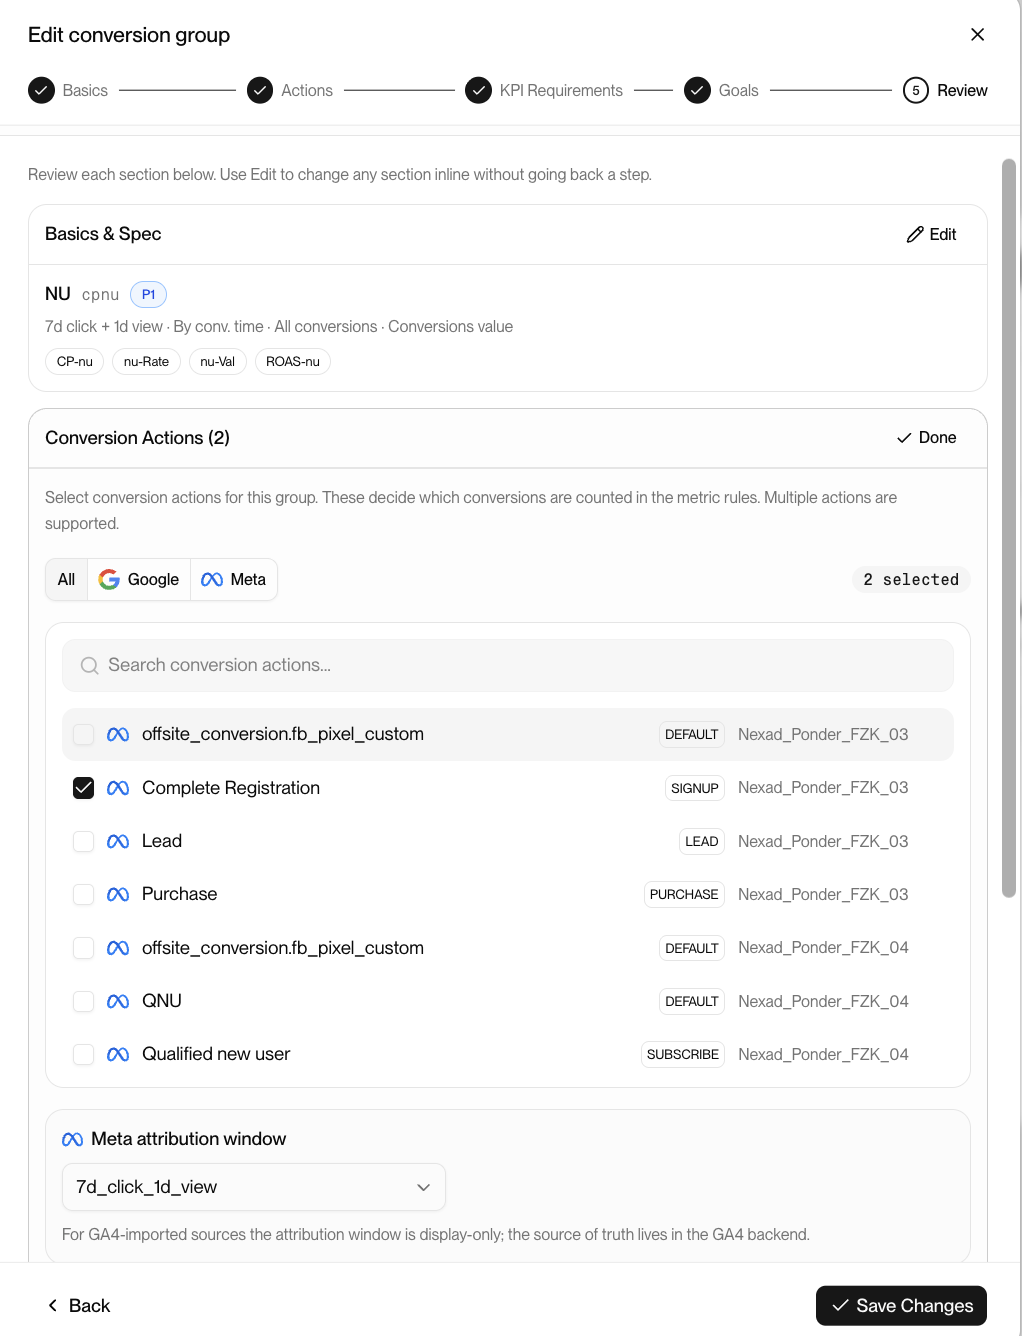
Step 1 — Basics & Spec
Define the group itself:
- Name and priority — a short name (e.g.
NUfor new users) and a priority (P0/P1) that controls how prominently it shows in reports. - Attribution window — e.g.
7d click + 1d view. - Attribution basis and value — by conversion time, which conversions to include, and whether to count conversion value.
- Metrics to compute — the KPIs this group reports, such as
CP-nu,nu-Rate,nu-Val, andROAS-nu.
Step 2 — Conversion Actions
This is the heart of mapping: pick which platform conversions count toward this group.
- Filter by All / Google / Meta to narrow the list.
- Each row is a real conversion action from your connected accounts, tagged with its type —
SIGNUP,PURCHASE,LEAD,DEFAULT, etc. — and the account it belongs to. - Check the actions that belong in this group. For a Sign-up / Acquisition group, you might select Meta's
Complete Registrationand Google's(web) signuptogether. A header shows how many are selected.
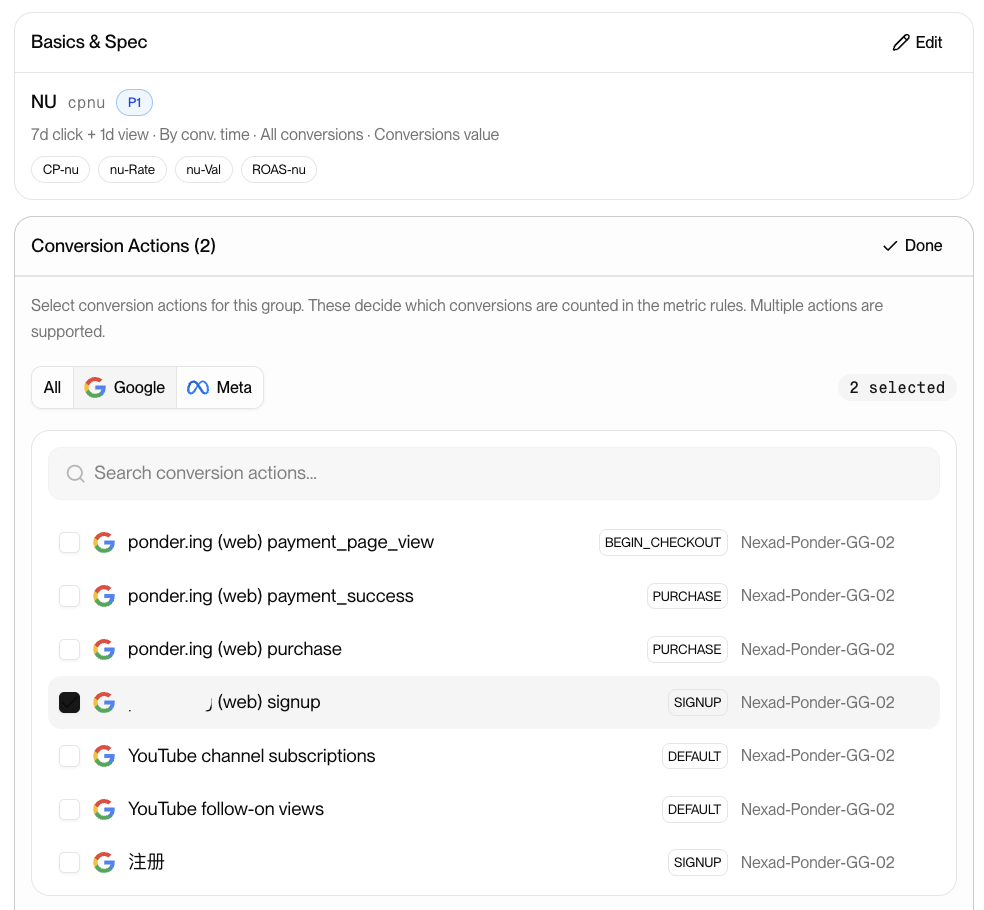
One group can include many conversions across both platforms — that's how four different platform names collapse into a single reporting category.
Attribution window per platform
You can set the attribution window per platform (e.g. Meta's 7d_click_1d_view). For GA4-imported sources the window is display-only — the source of truth lives in the GA4 backend.
Steps 3–5 — KPI Requirements, Goals, Review
The remaining steps let you set KPI thresholds and goals for the group, then Review everything on one screen. Use the inline Edit on any section to adjust it without stepping backward, then Save Changes.
Once saved, the group's conversions are unified — your reports and dashboard use the same conversion columns across every platform and campaign.
Tip: Start from the categories you want to show in reports, then map existing platform conversions into them — not the other way around.